Let’s cool down with some ICE play!!!

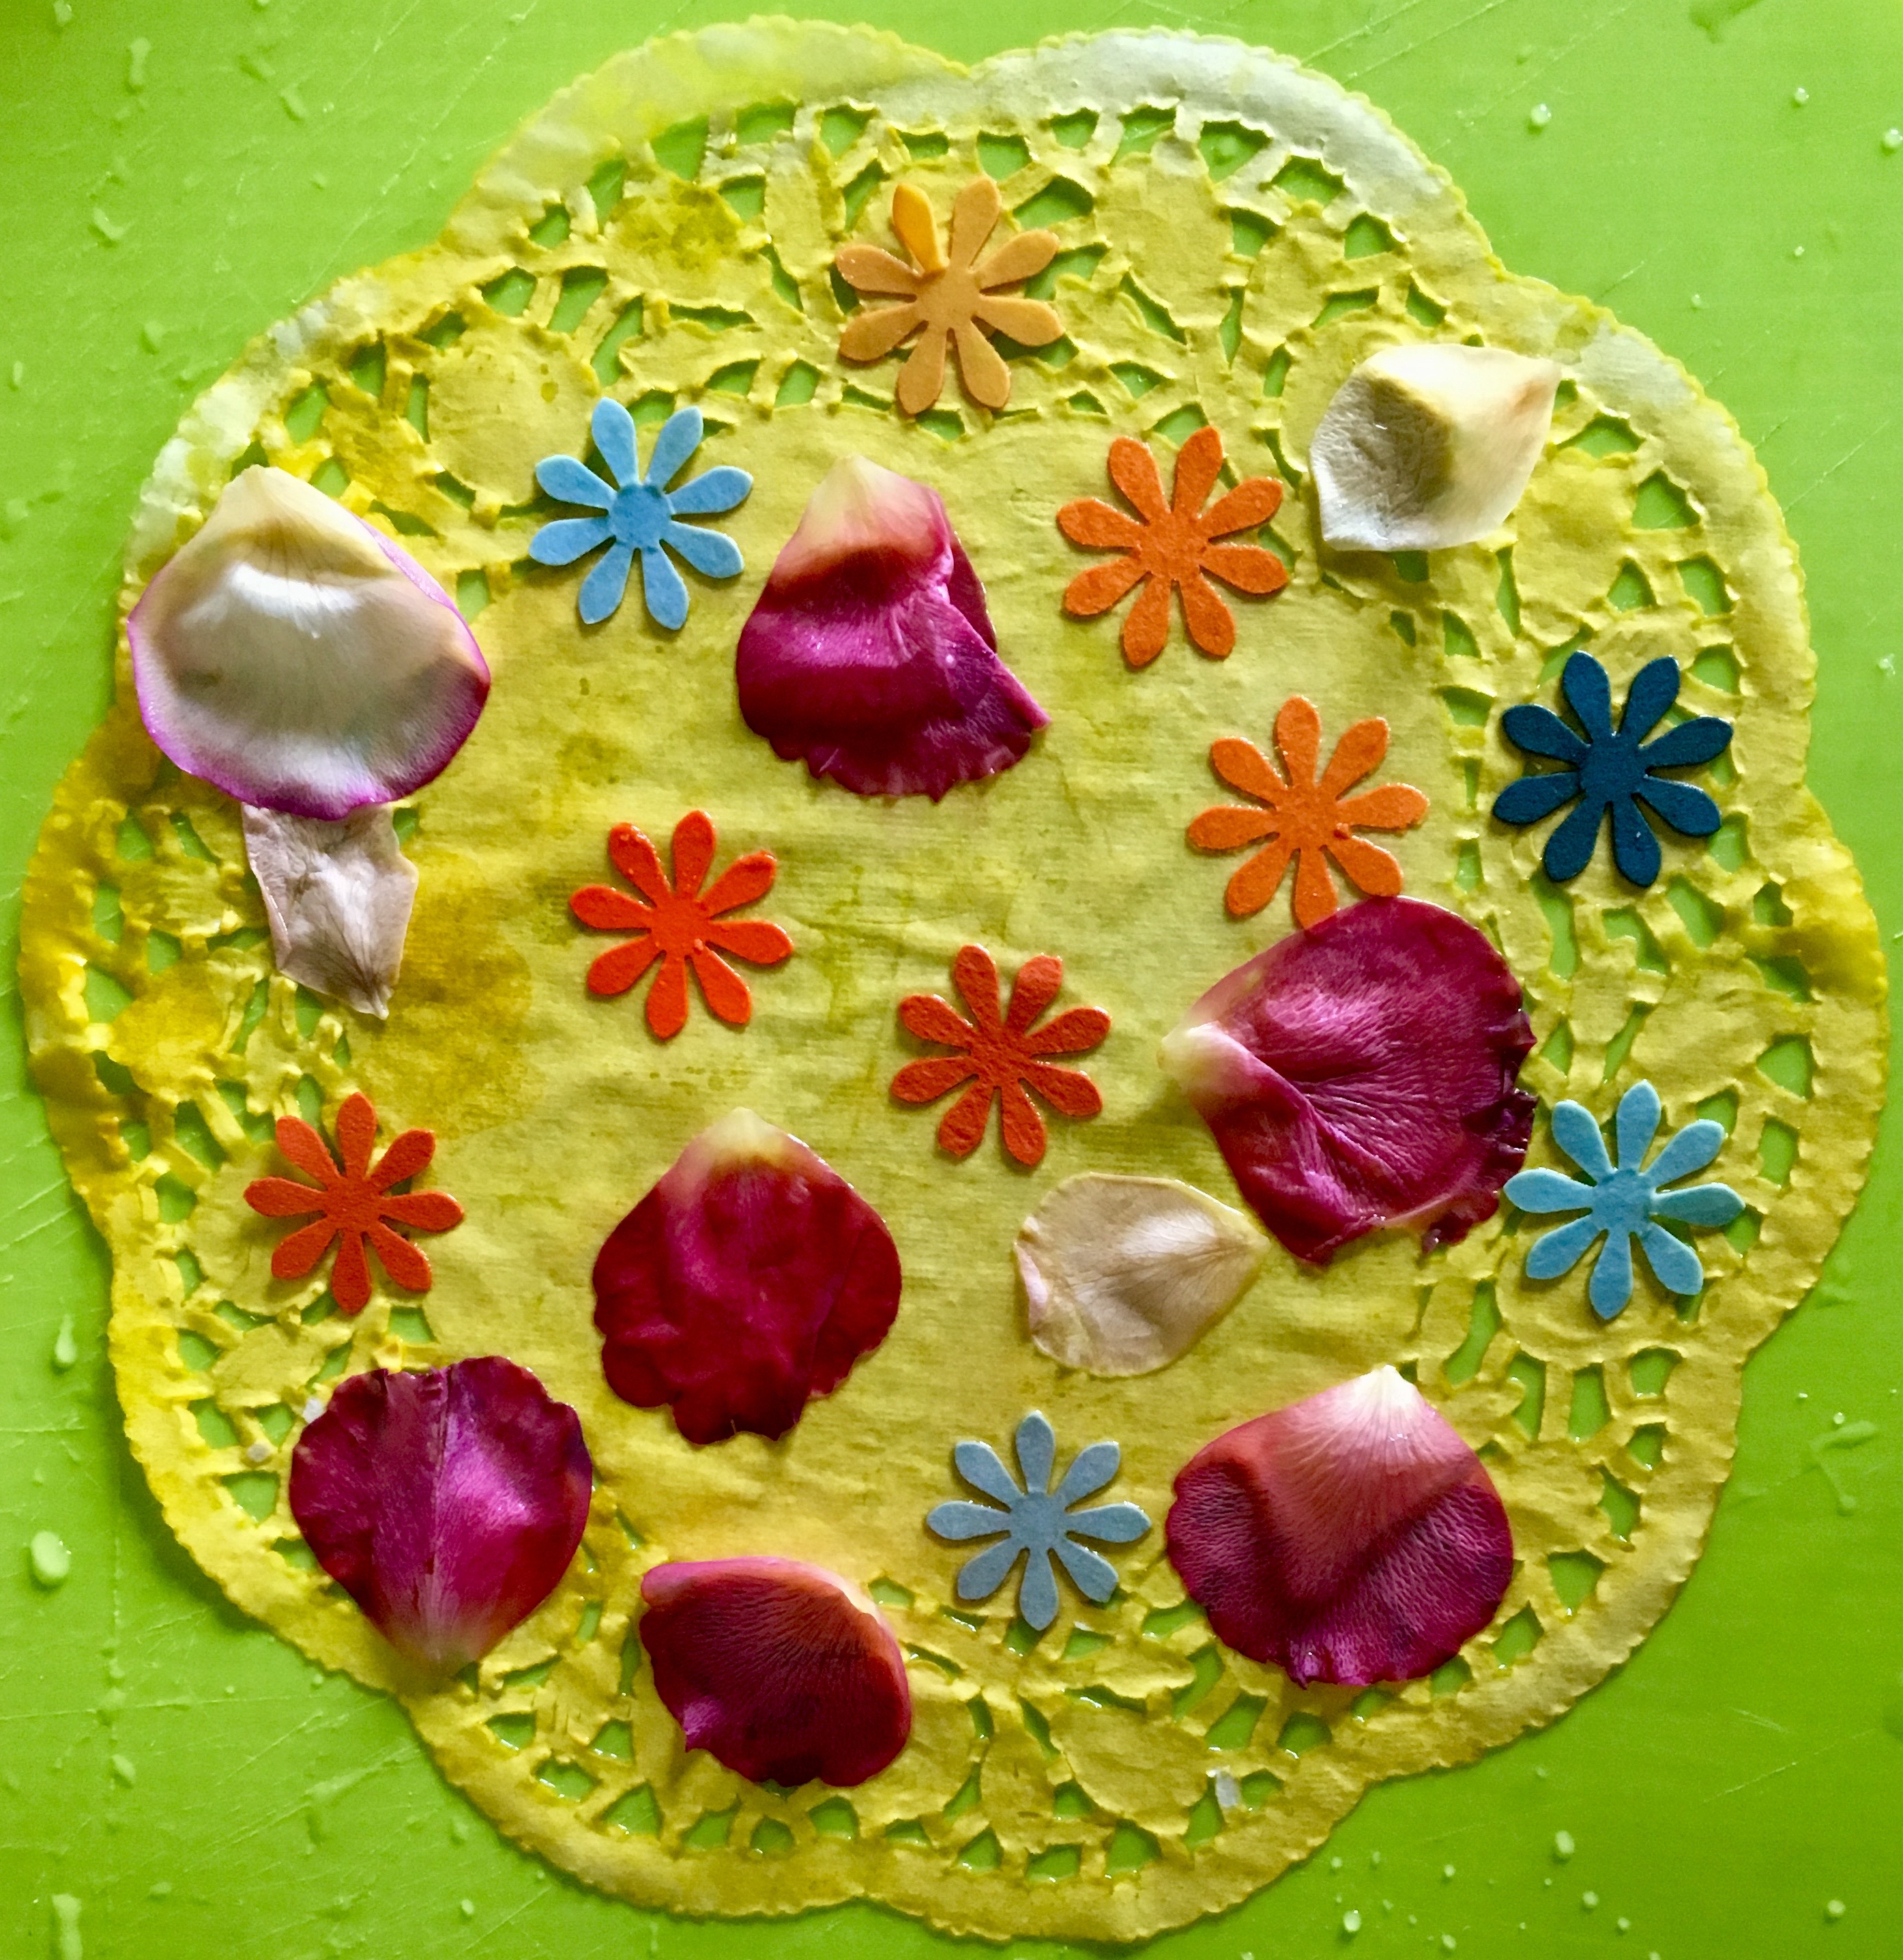
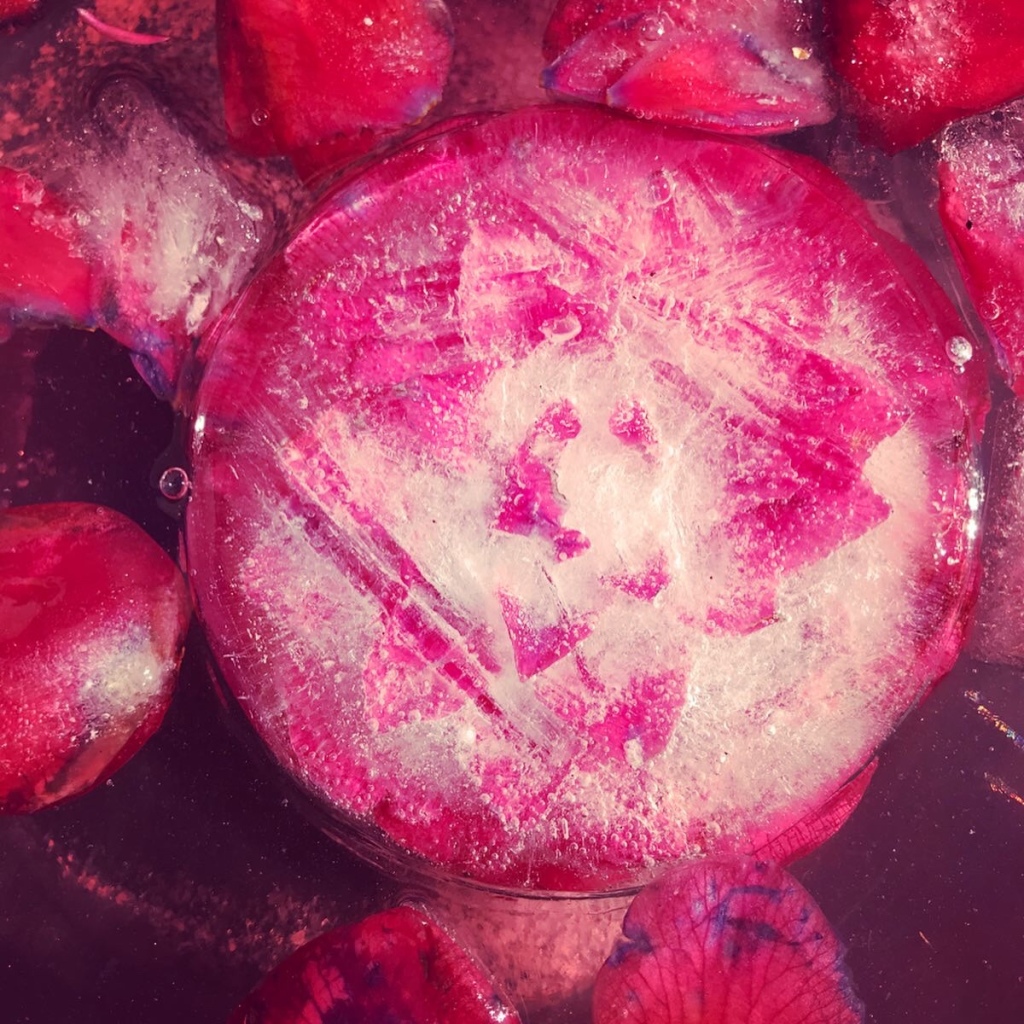
One of the first activities I did when I joined the play team @monthly_play on Instagram was called “Melting into Spring!” It involved freezing flower petals in ice using silicone cupcake moulds then using coloured water and salt to try and melt them (see under “Nature” category to check this out in full.)

Since then my son has loved ice play and he will often ask me to make some ice for him to melt. We have recently introduced it to his little sister as well who also seems to be a fan! I decided to look back through our Instagram grid and share with you all the different ways we have played with ice to hopefully inspire you to have a go and cool down in all this hot weather!!

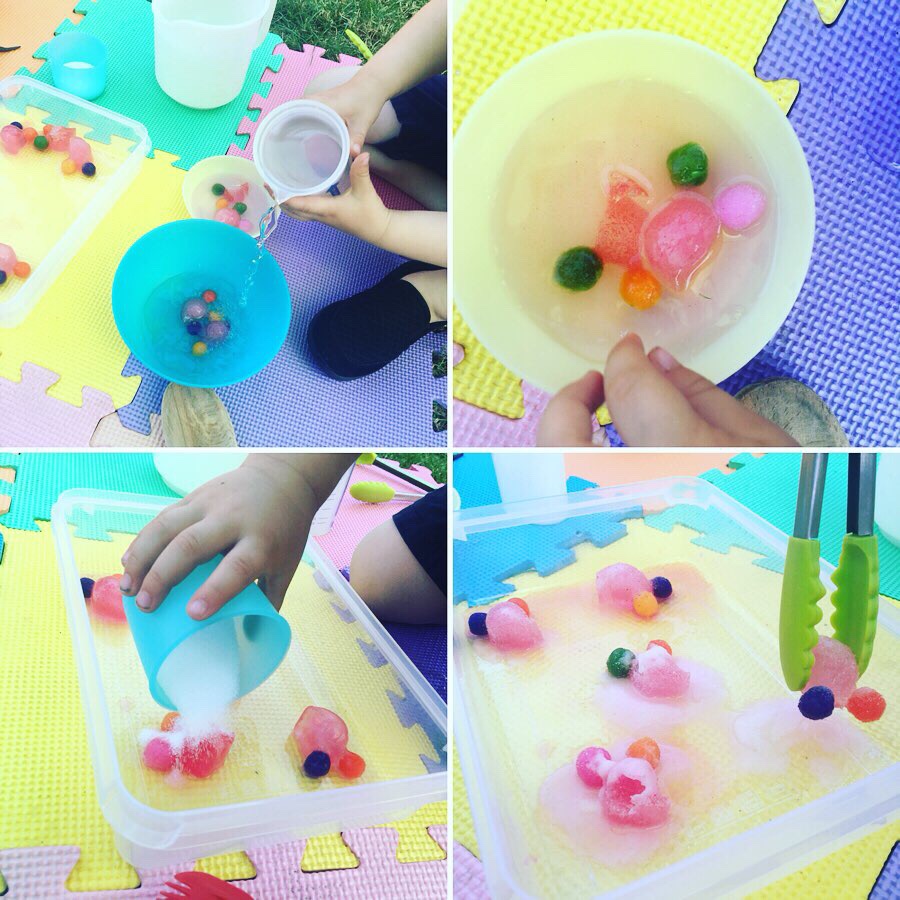
One of the things we regularly do is freeze things within ice and then “rescue” the items (often with members of the Paw Patrol or PJ Masks lending a hand!) We have frozen; herbs, flowers, Pom-poms, toys, numbers and sequins to name but a few! I have also experimented with making different coloured ice by adding food colouring, which is a simple but really effective twist.

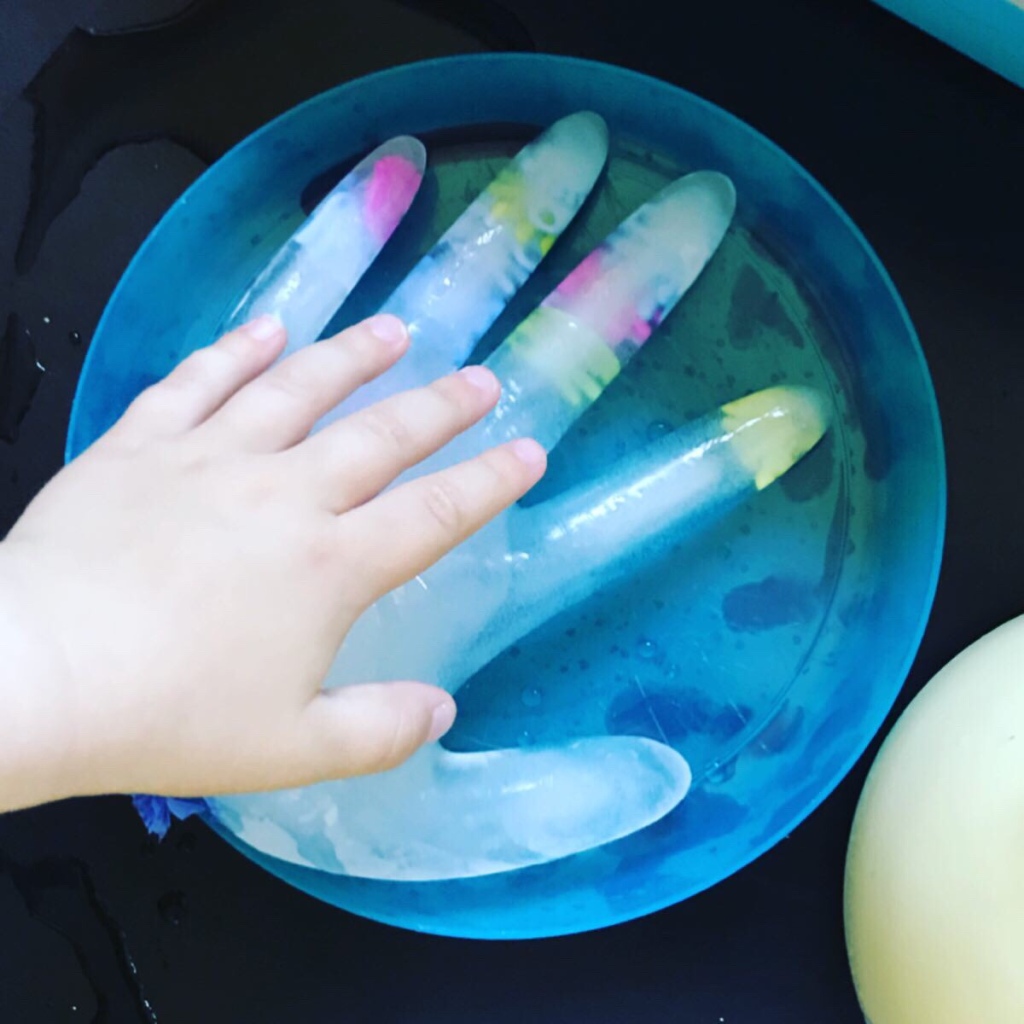
My son loves trying to get the things out of the ice and we have experimented with many different ways of doing this such as; cold water, hot water, coloured water, salt, sunshine, a hammer or a combination of them all! We have also frozen things in a variety of shapes to fit a theme of play such as; hands or Mickey Mouse and in different sizes so we can experiment with which will melt the fastest.

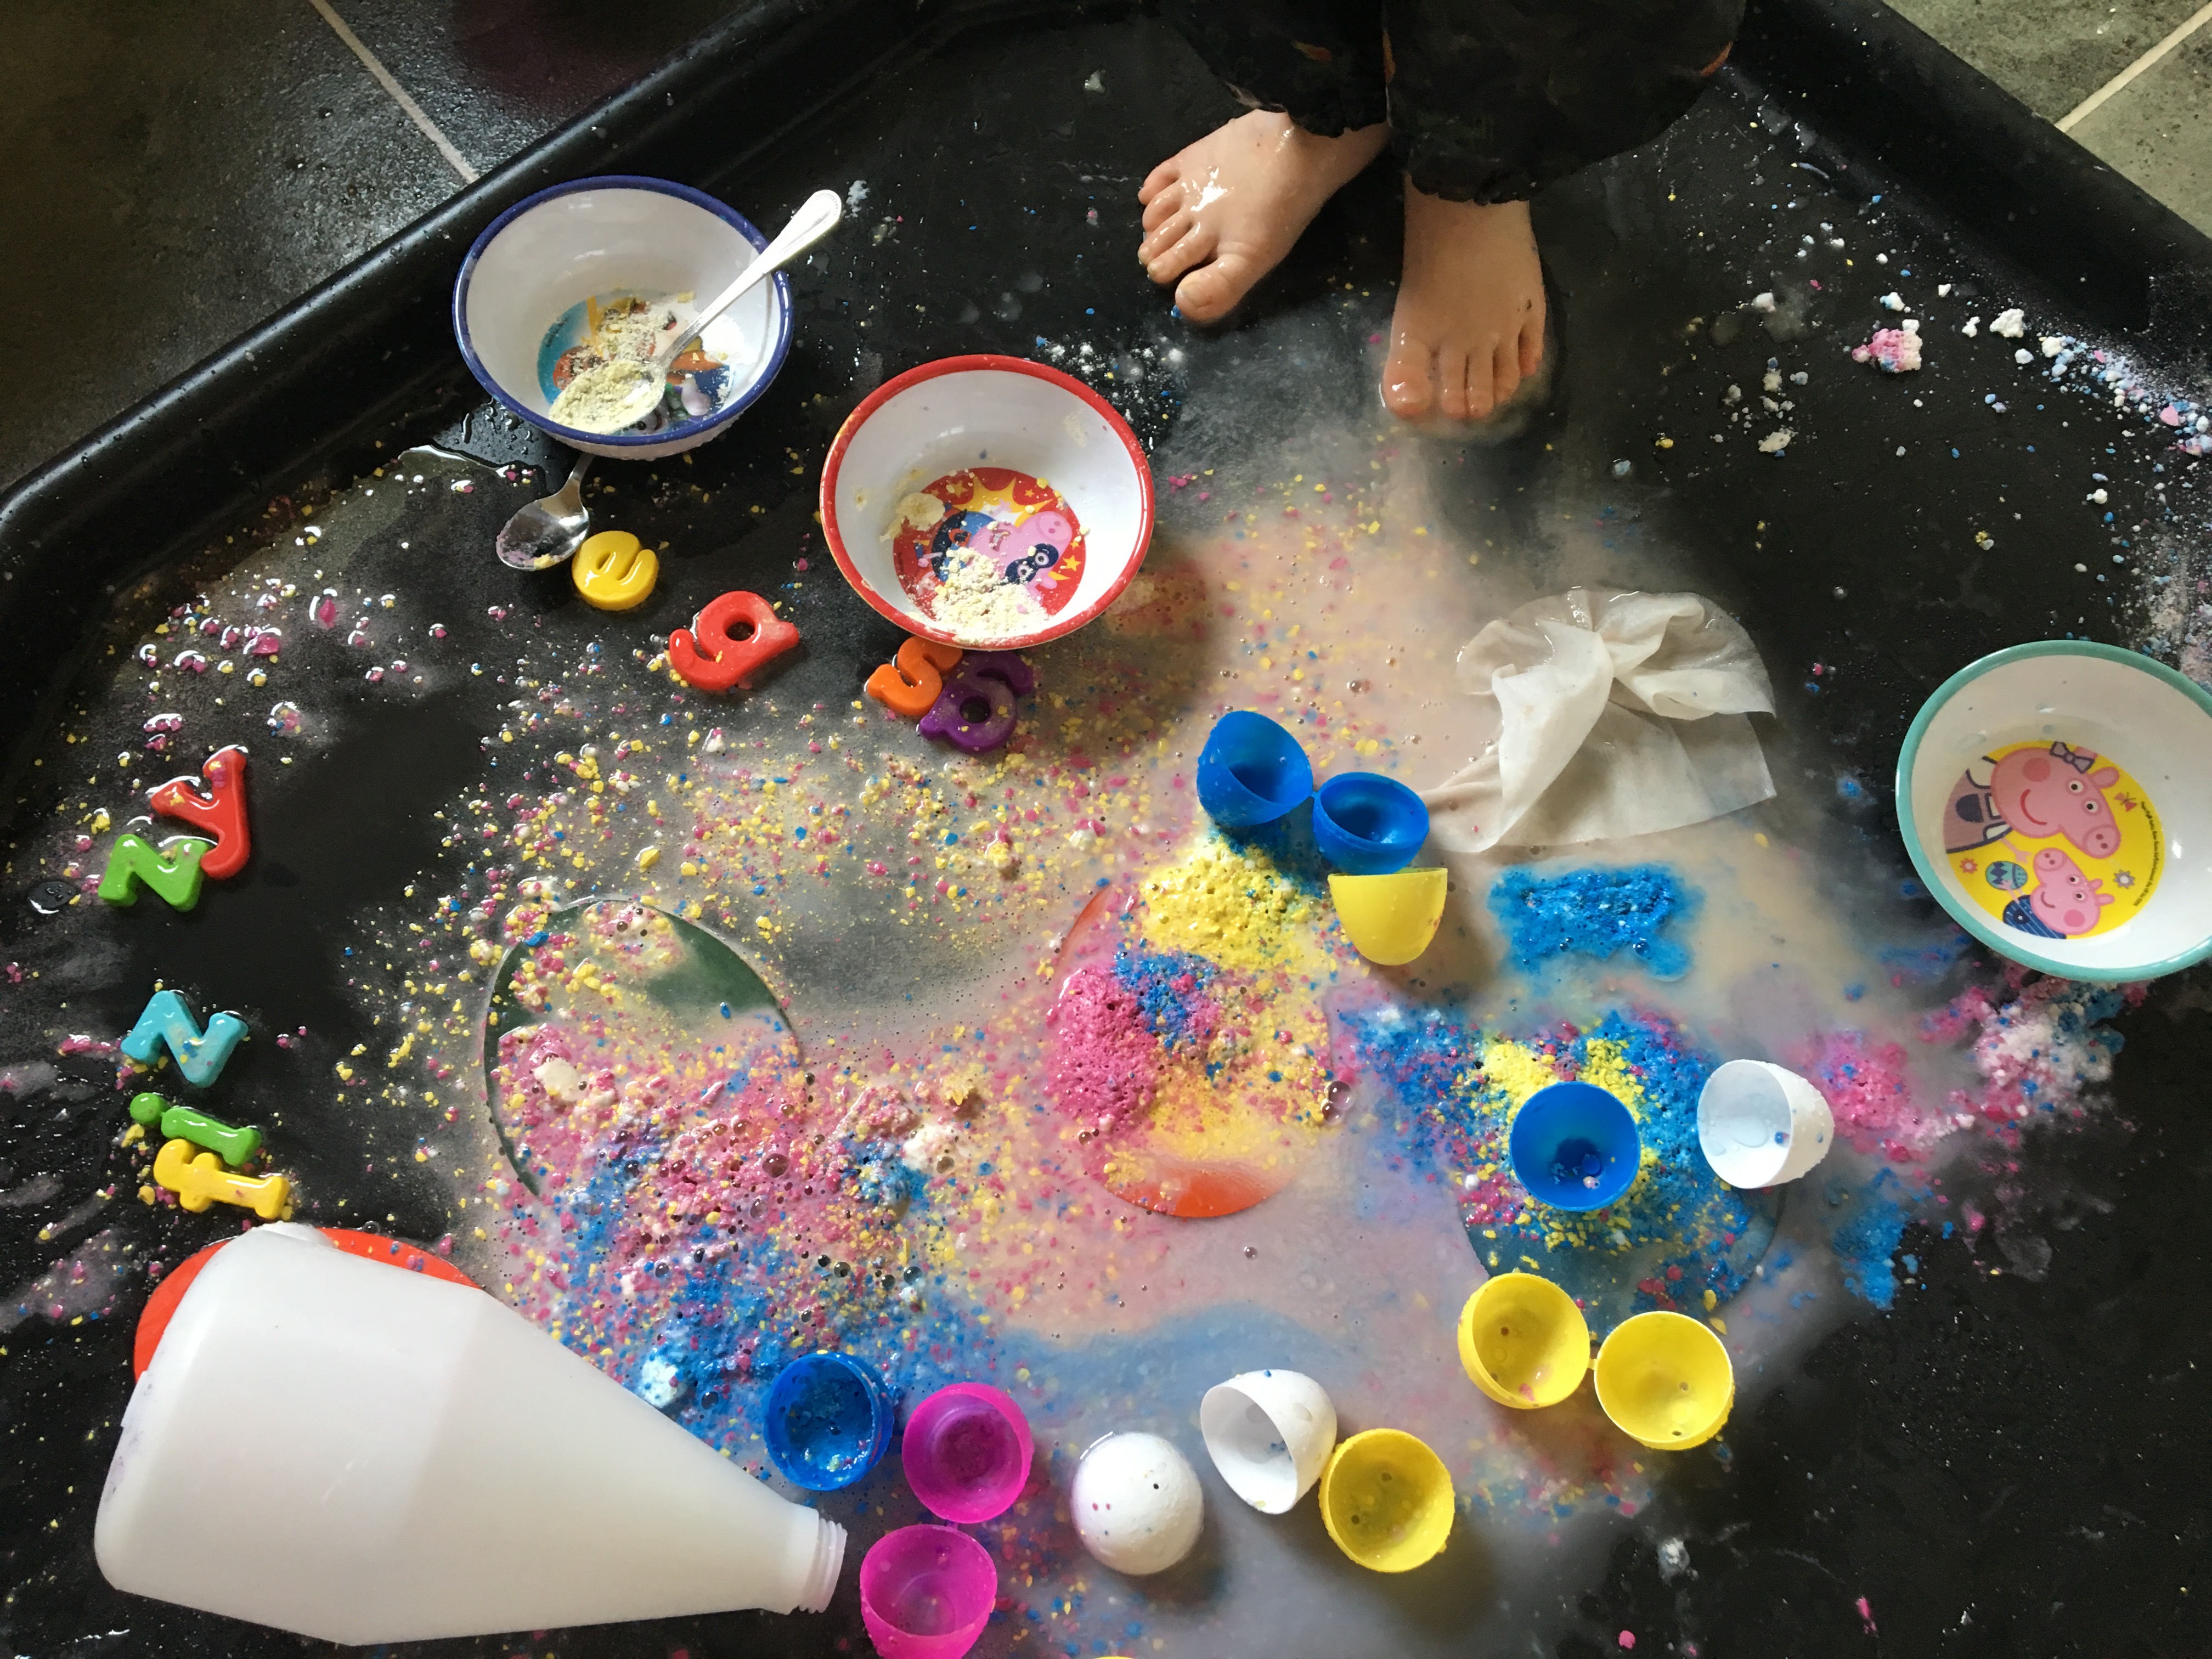
One recent activity I did was based on ‘Scientist Role Play.’ For this I froze a mixture of; baking powder, water and biodegradable glitter to make funny looking ‘germs.’ My son then had to mix some medicine and drop it onto them to make them go away. One of the ingredients I gave was vinegar so when this came into contact with the baking powder the ice cubes would fizz! Having played a lot with ice over the years this twist really grabbed my sons attention! (why not check out our Instagram grid for more information and videos!)

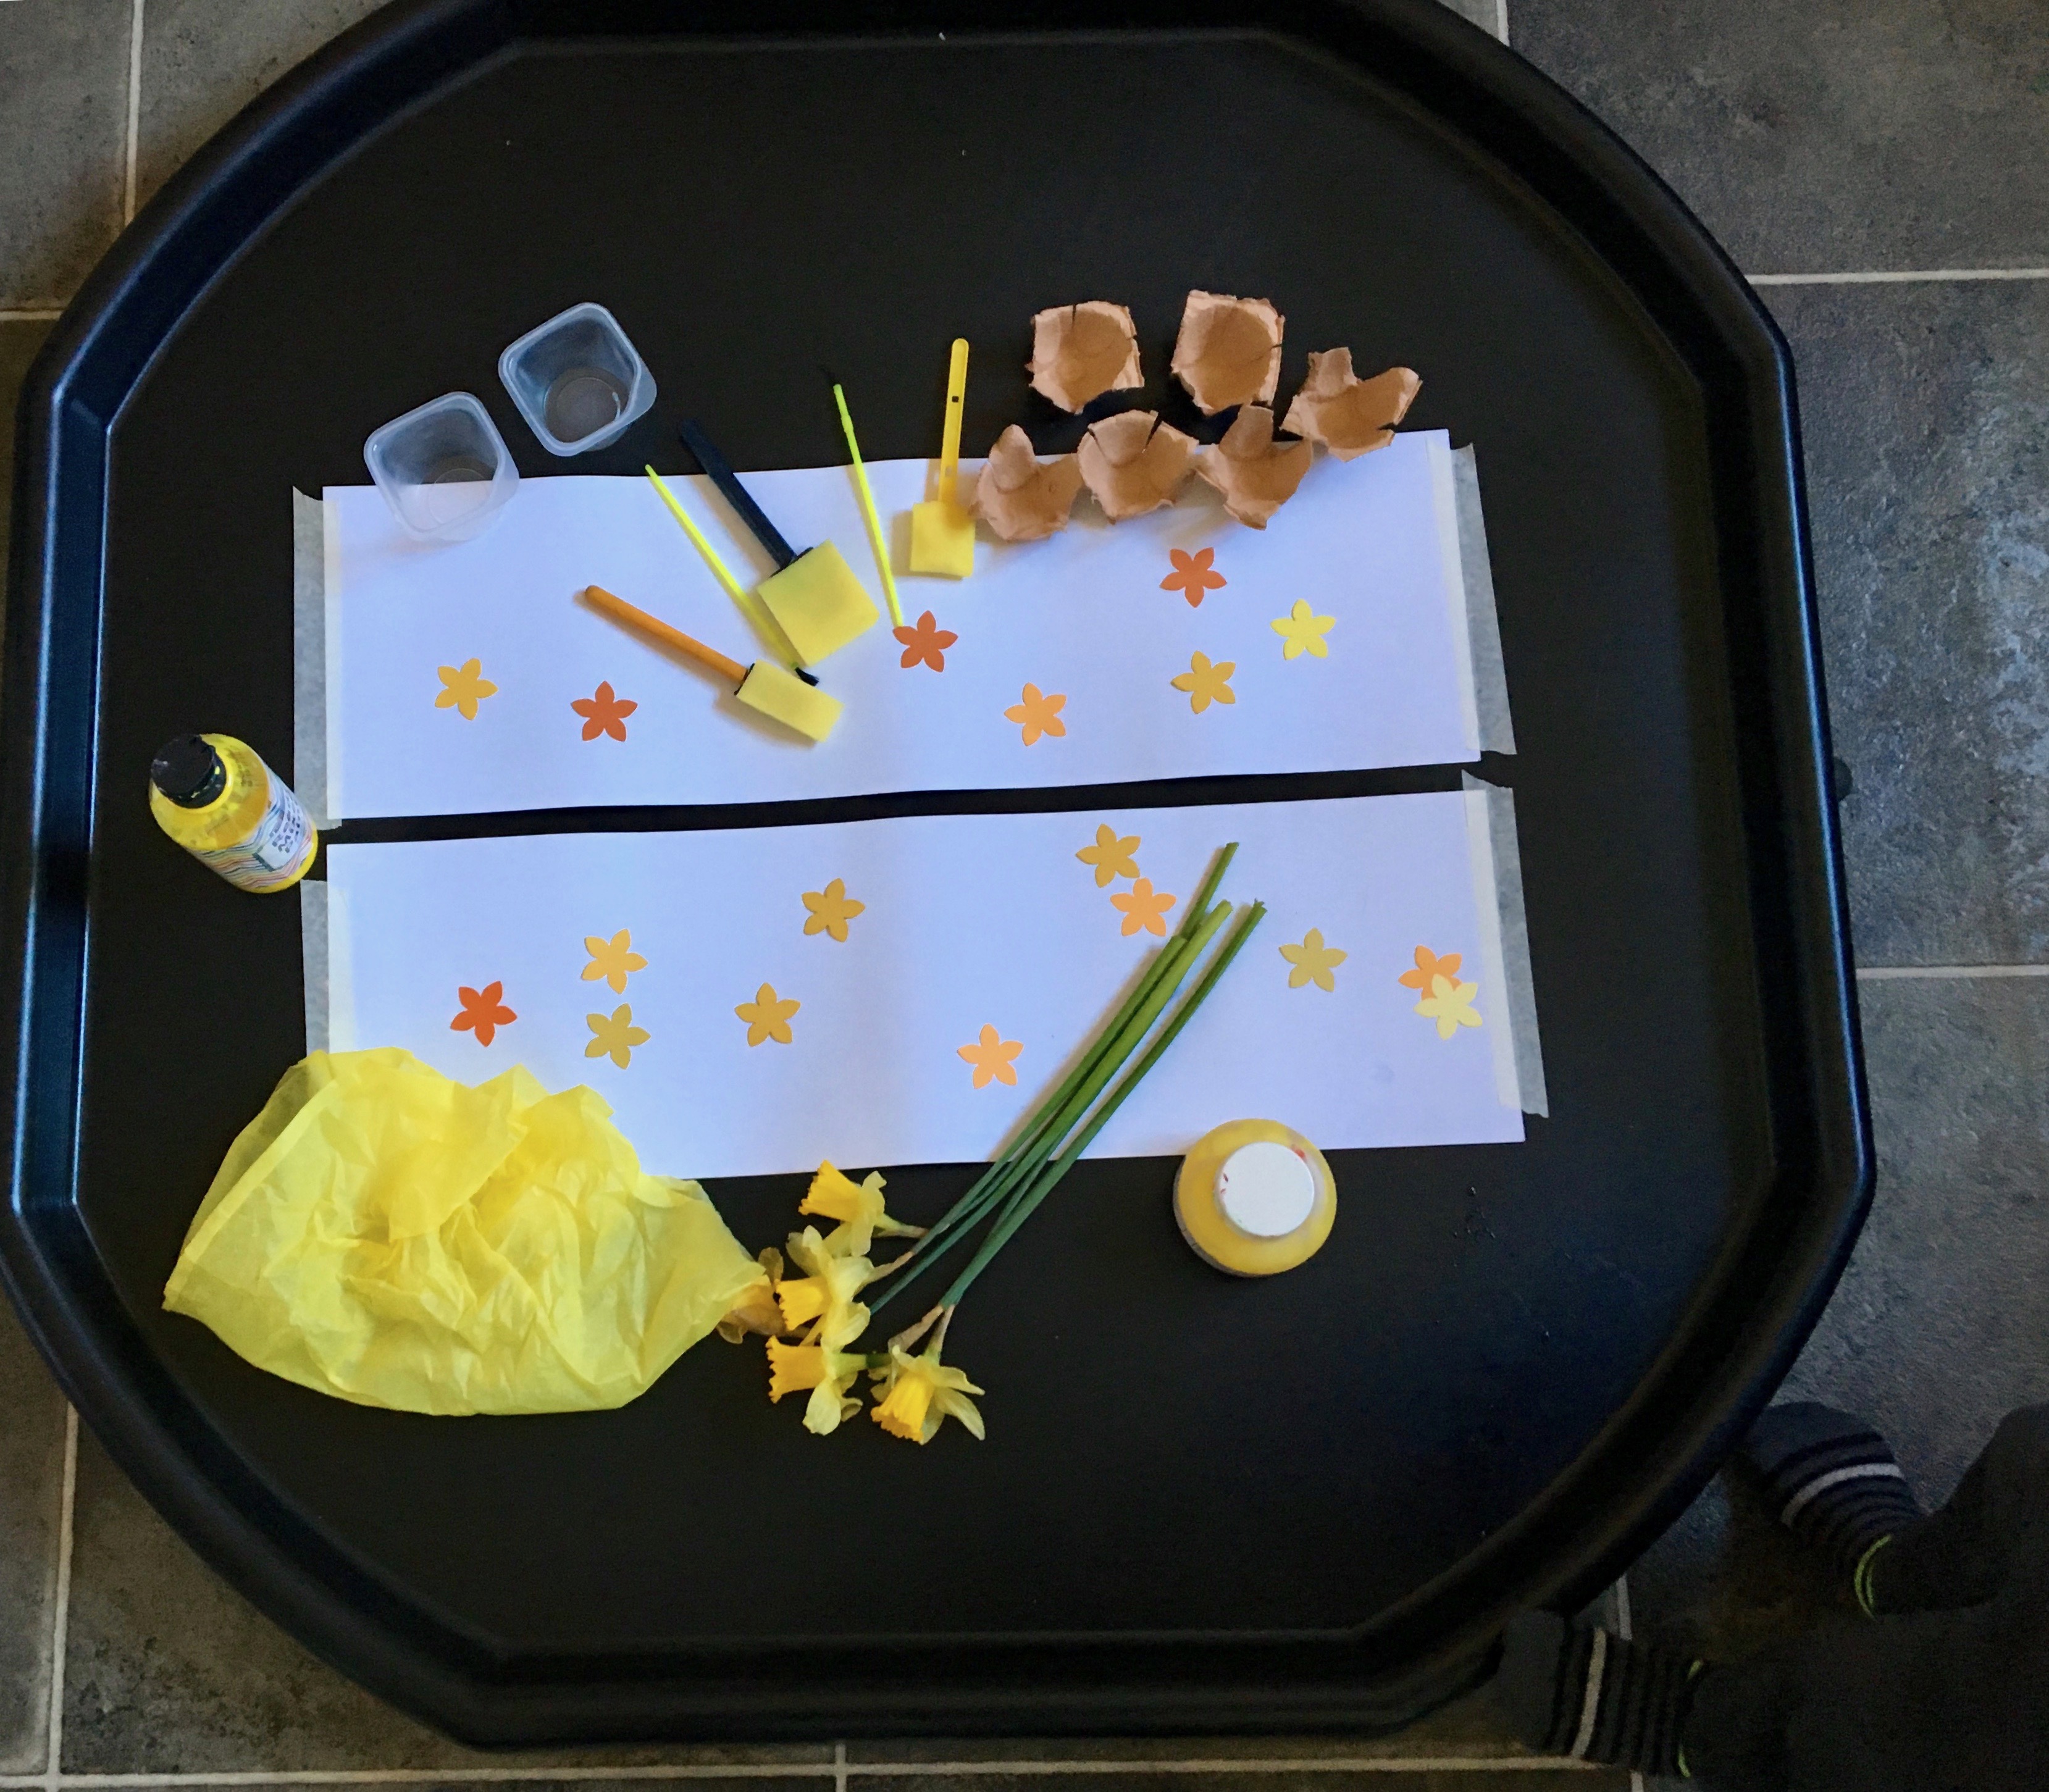
Another great thing about ice play is it is easy to set up, cheap and you can play it in many different settings! For example I set up many activities on our tuff tray which can be inside or outside depending on the weather. However, you could quite easily use a sink, a water tray, a washing up bowl, a plastic tray, a paddling pool etc etc As long as it’s something you don’t mind getting wet then it’s fine. Having a contained area is best though as many times Ice play turns into potion mixing (another one of my son’s favourite things!) so having some containers and utensils on hand is a handy tip to prolong the play. Another thing I’ve learned along the way is to always have back up ice cubes as often my son will have had such fun melting ice he’ll want to do it again instantly!

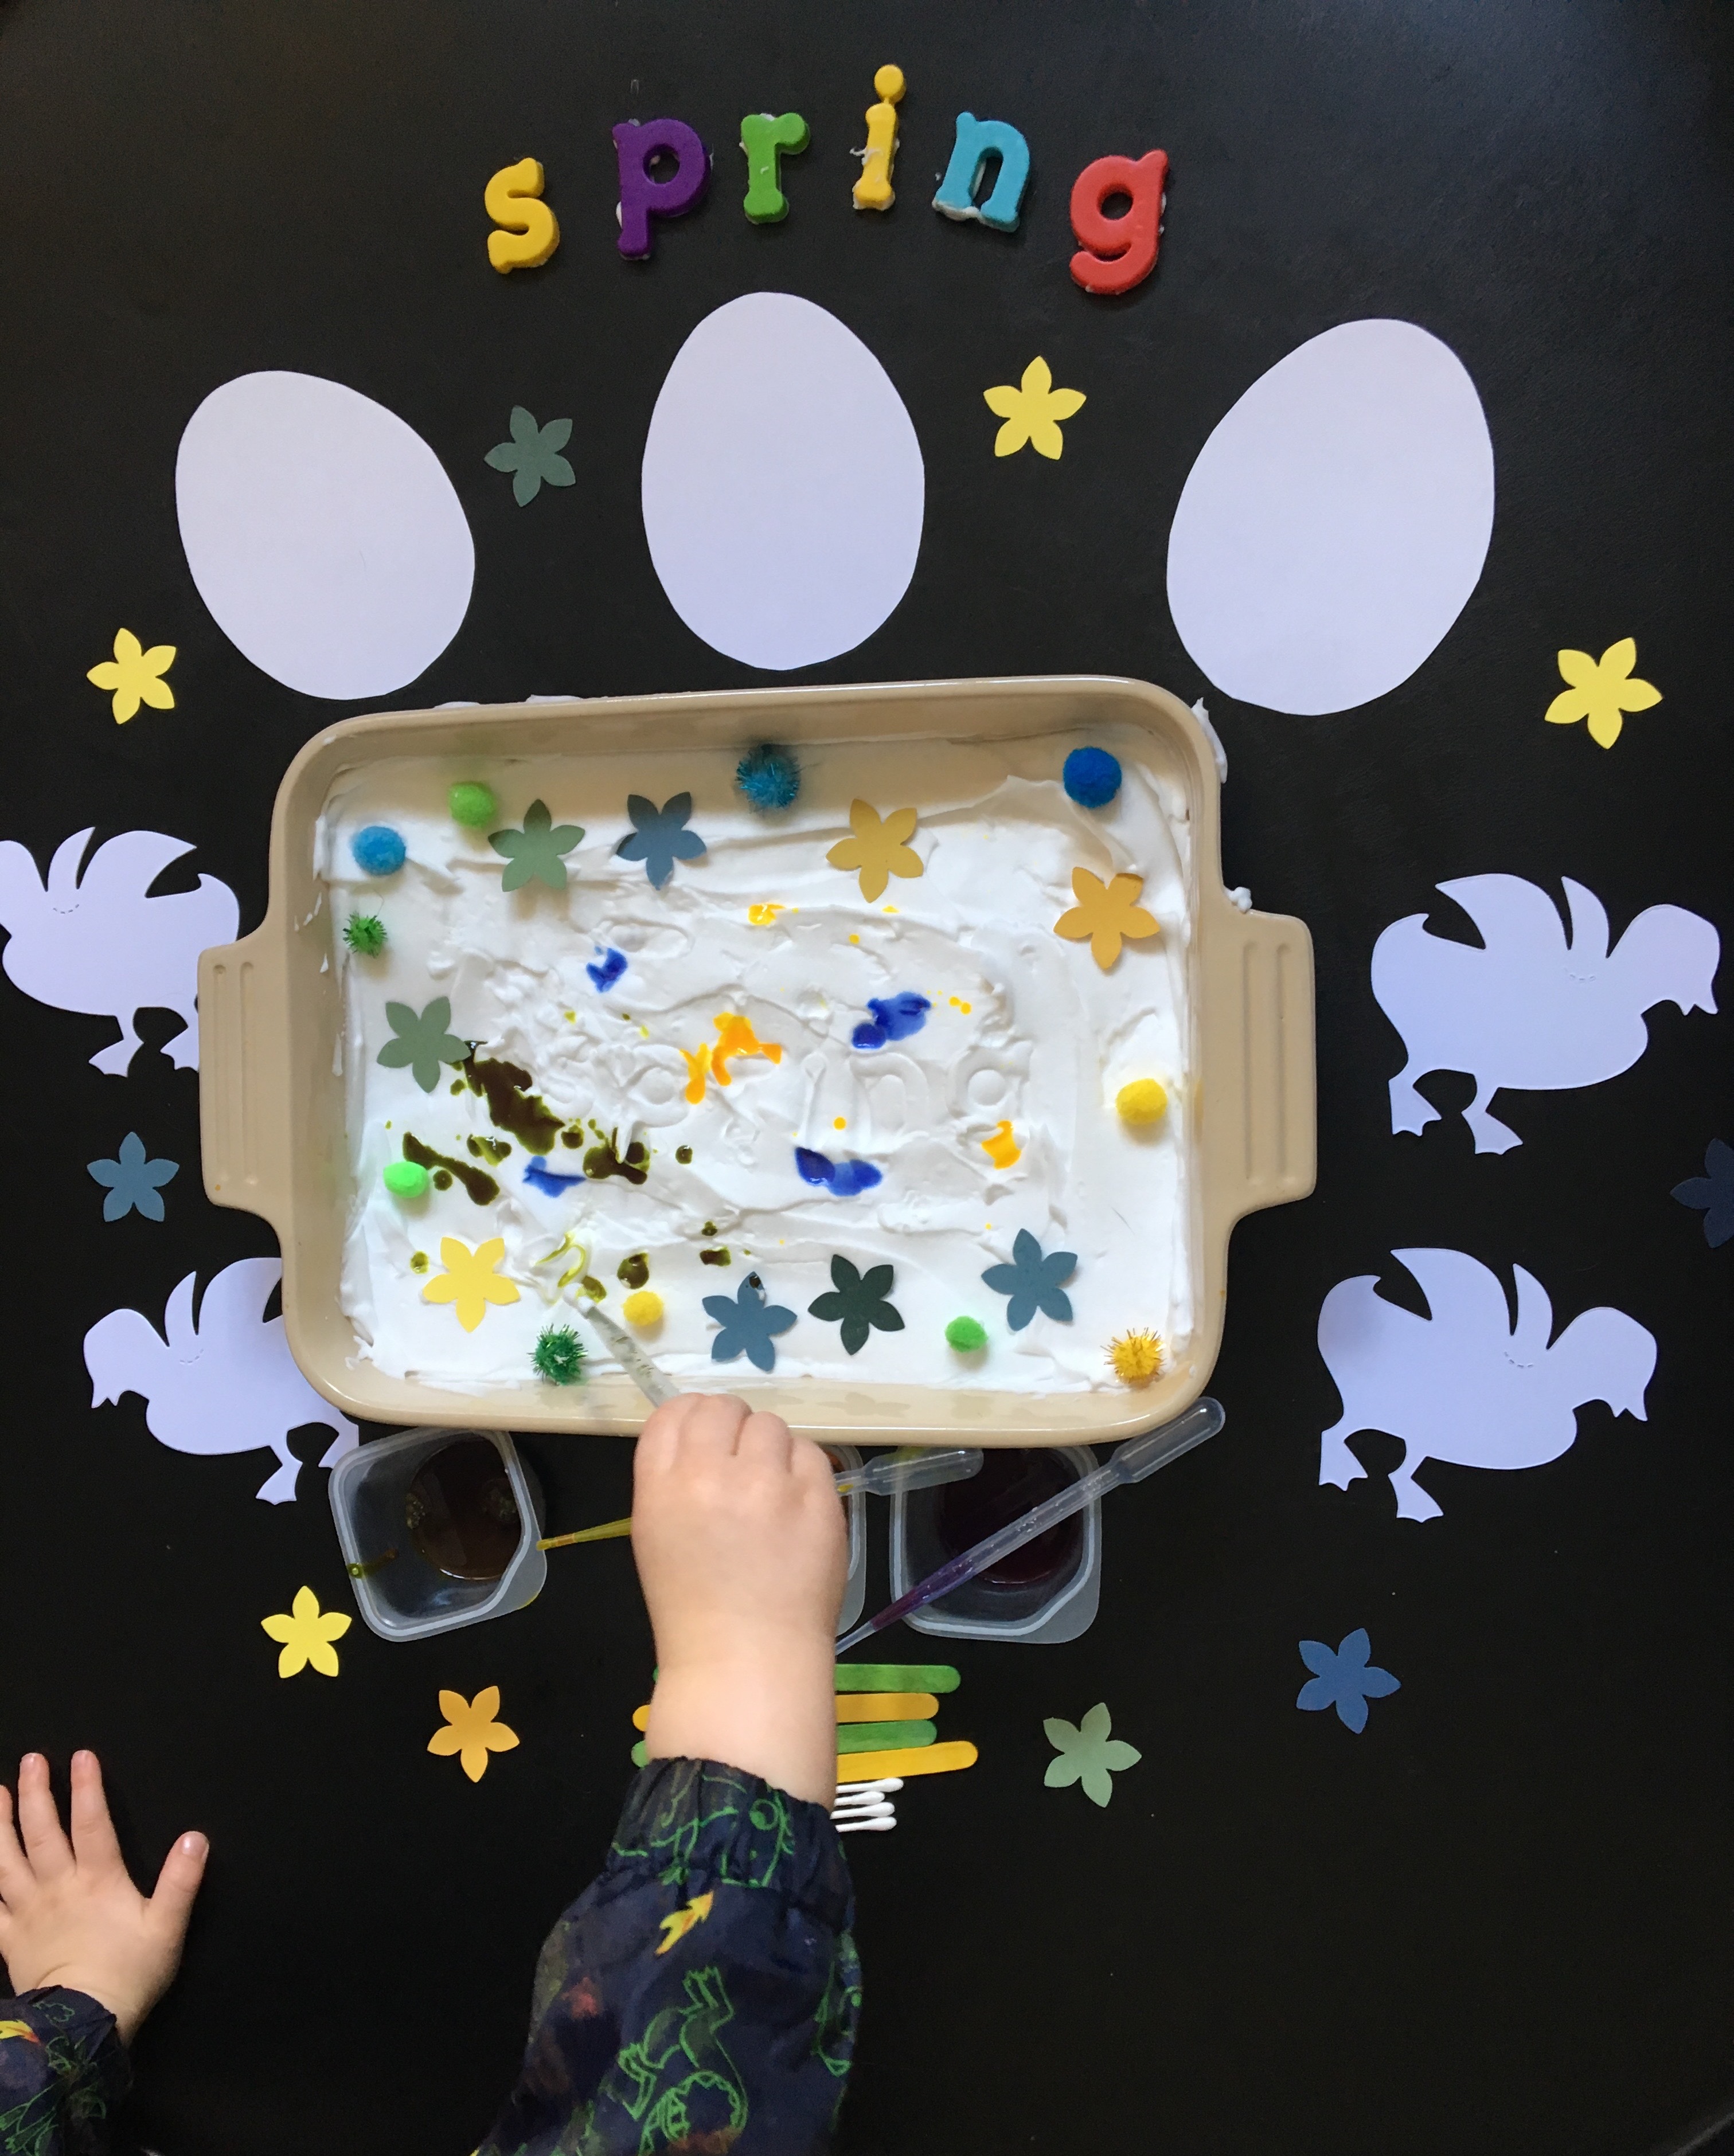
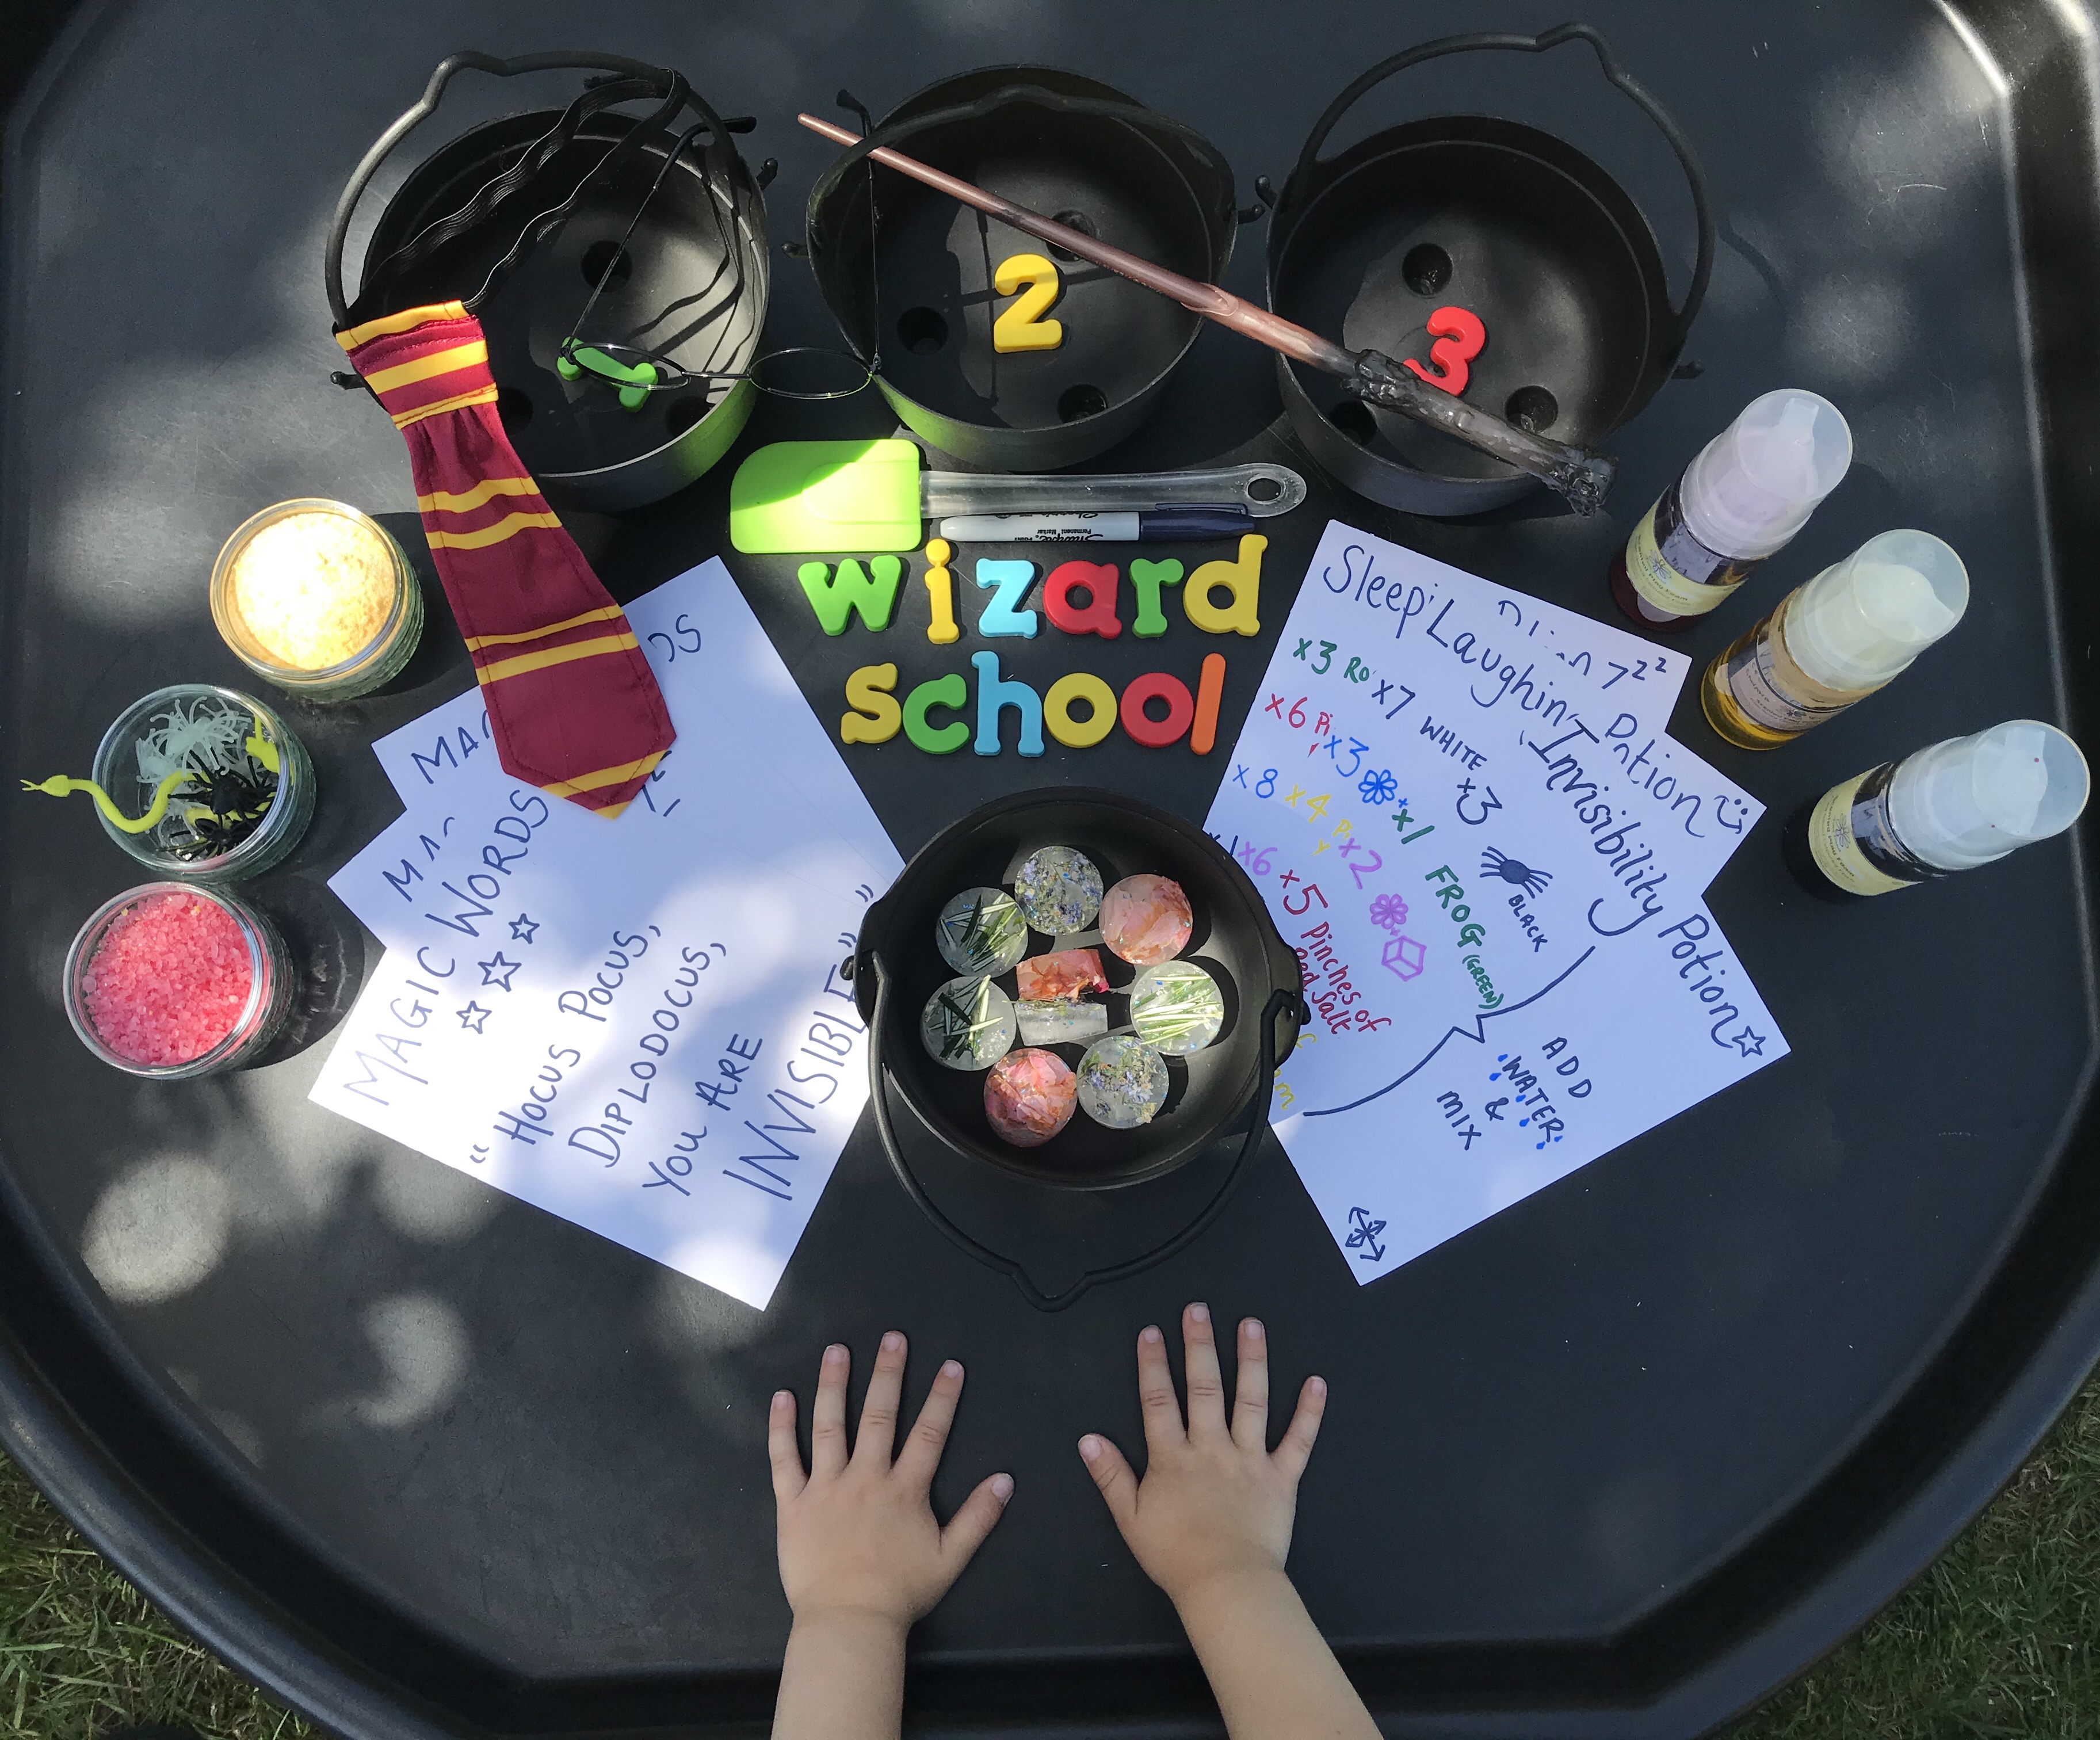
As my son approaches school age I’ve also tried to use his favourite types of play to include letters and numbers so it’s kind of secret learning through play! One way I have tackled this recently was to set up a ‘Wizard School’ based on his recent love of Harry Potter. This included magical ice cubes as one of the ingredients required to make his potions! He had to help read the ingredients (made up of pictures, colours, numbers and words) mix the potions and then say the correct magic words (check it out more on Instagram!)

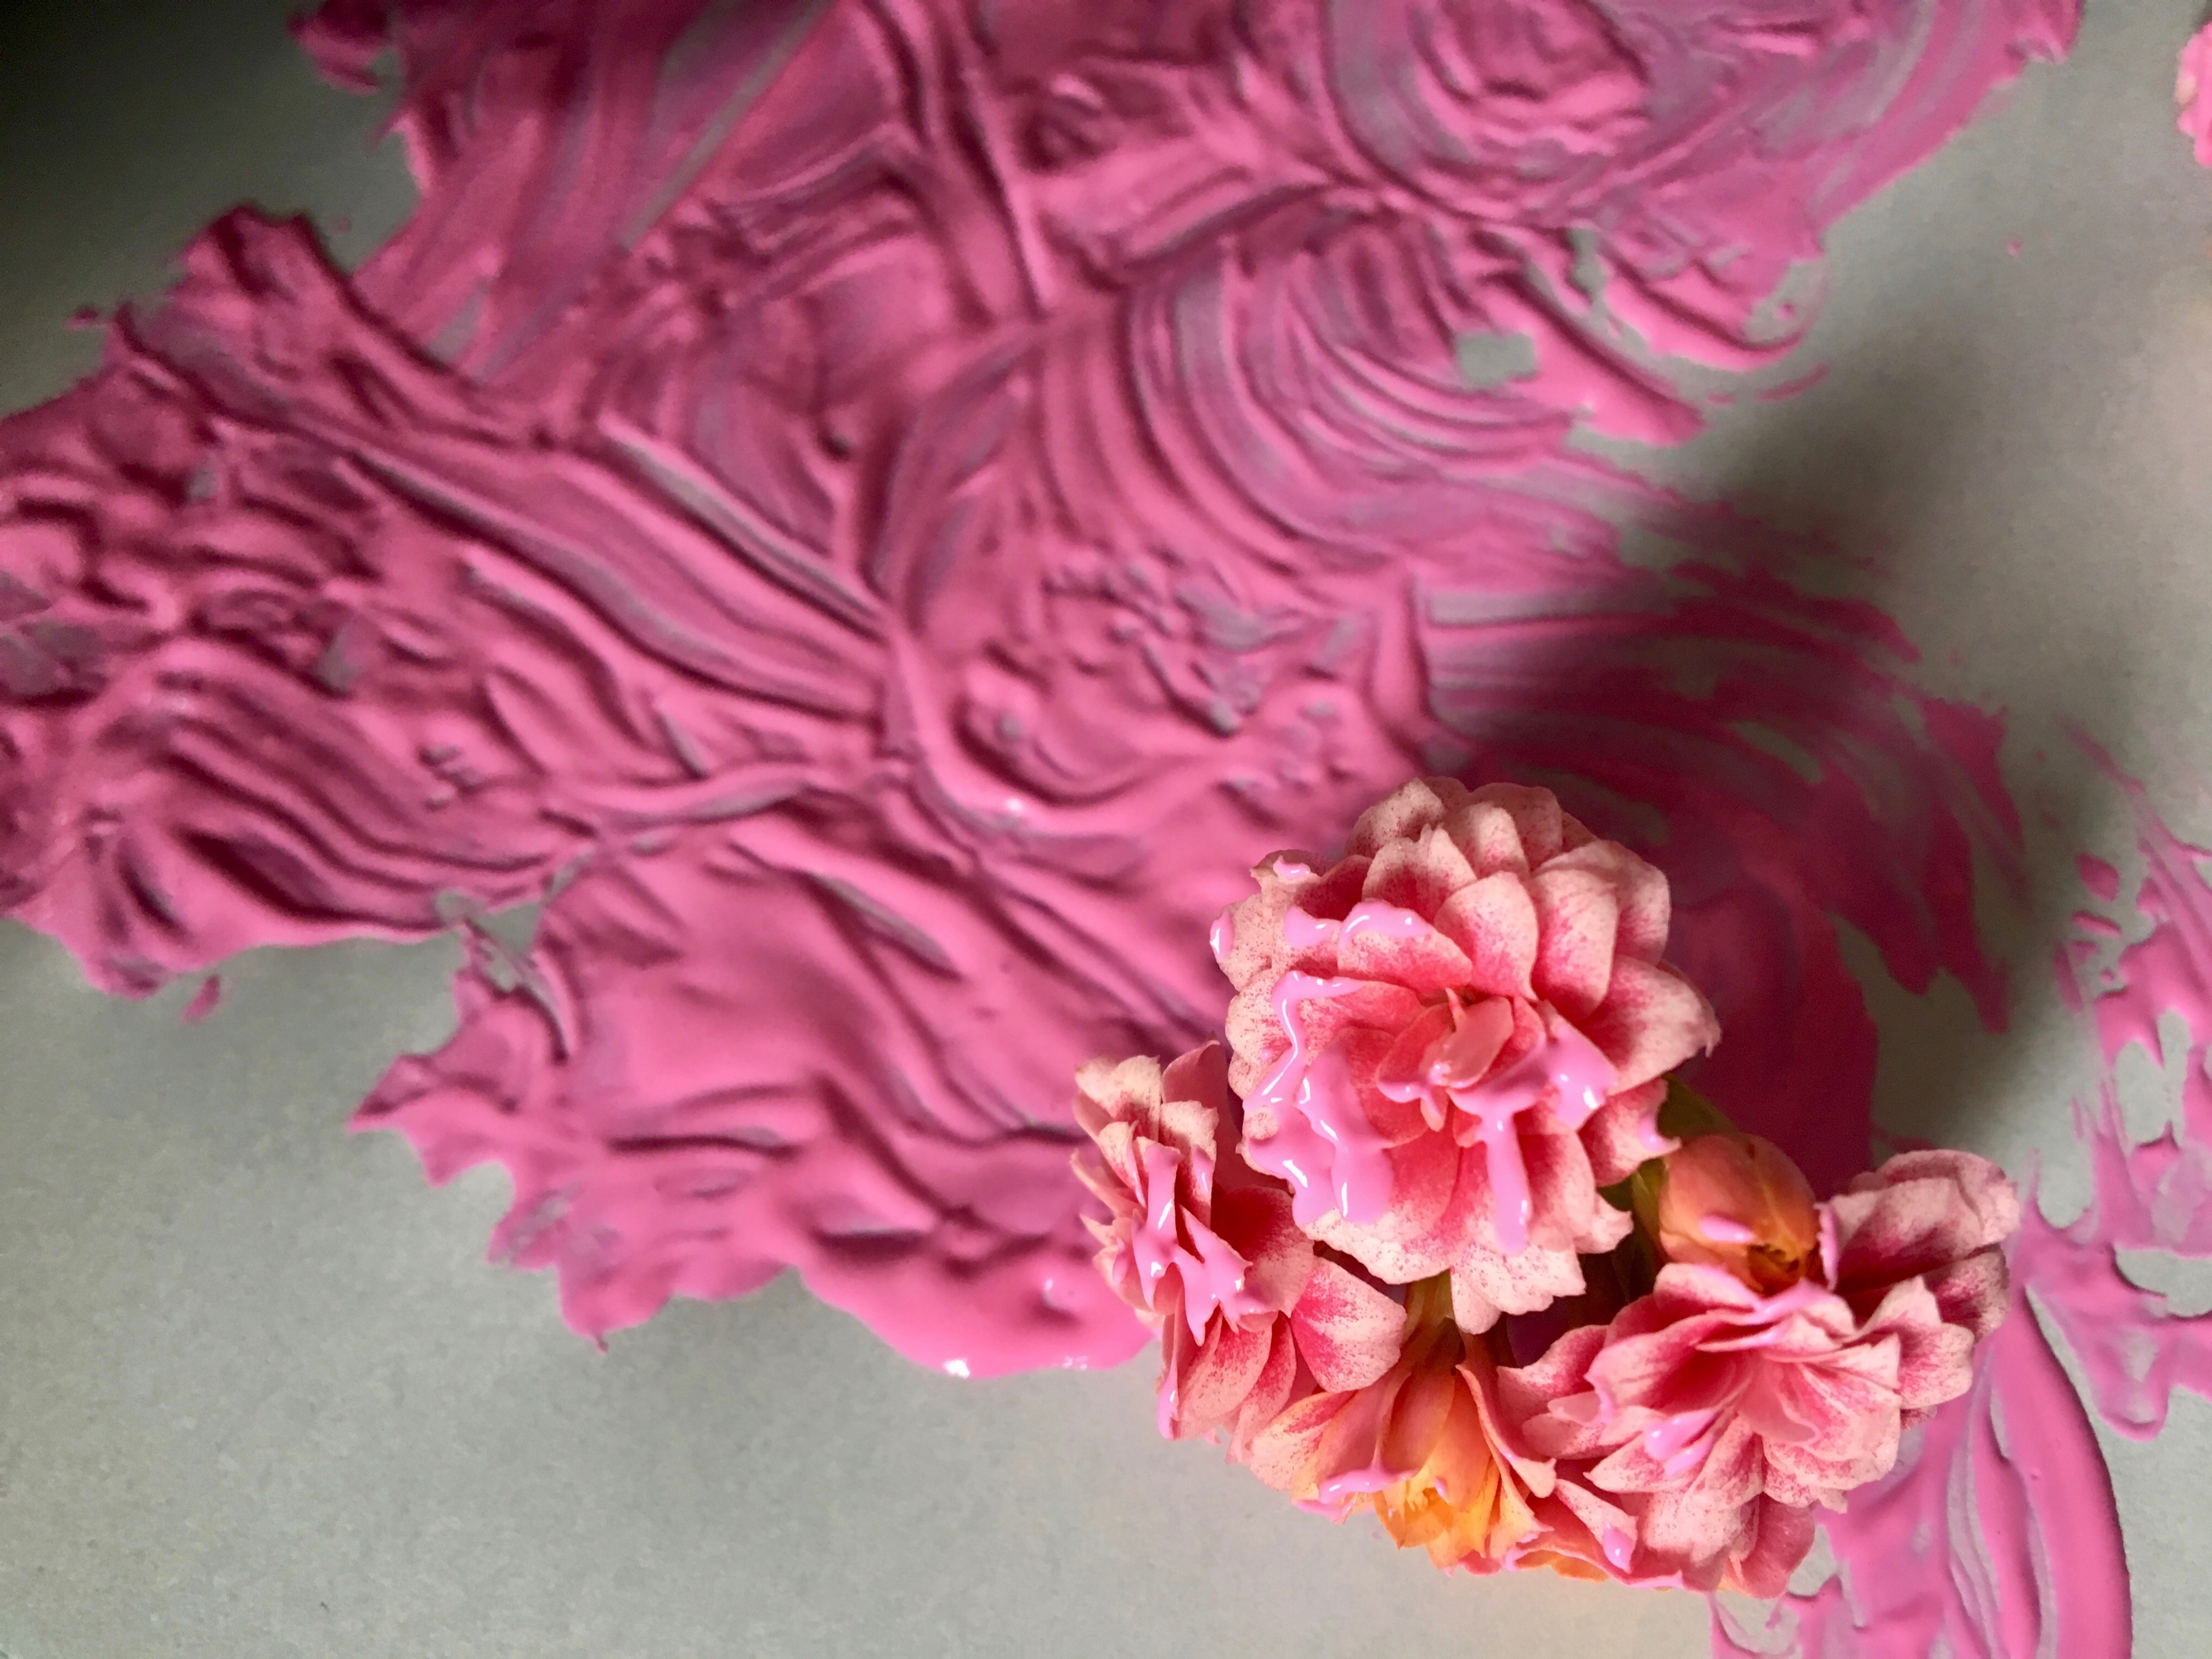
I will leave you with our latest ice play which was my little girls first time exploring ice. It was a simple set up but a real hit with all of us. We went round the garden picking herbs and a few flowers, whilst doing this we learnt their names, what they smelt like and how they can be used in food! My son then asked to freeze some. We did this in small and large ice cubes so we could see which would melt the fastest. When I took them out of the freezer they looked really beautiful so I had fun taking some arty photos before letting the kids loose on them outside in our water tray! My little girl squeeled with delight as she picked up the ice and found it cold and slippy! She even had a little taste (another great thing about ice play is you can make it taste safe!) I then watched as my son helped show her how the ice melts, it was a lovely activity for all of us on a hot afternoon! Why don’t you have ago!

Next on our Ice play wish list is frozen water beads & ice painting so keep an eye out for those! Why not follow us on Instagram (@megaawesomemessyart), Facebook (Mega Awesome Messy Art) and (Twitter @megaawesomeMA) so you don’t miss out in any of our messy escapades! 😊

A Little Update!

I haven’t written on the website for a while; kids, work and life kind of got in the way and it got put on the end of my ever growing list of things to do! However, with lockdown slowing down the world (but not our kids) I thought now would be a good opportunity for me to “re-launch” the website blog so I can share all of the activities and ideas I have stored up from continuing to co-host monthly play prompts with the @monthly_play team on Instagram.

I am also re-jigging my Instagram page @megaawesomemessyart so the ‘highlights’ are sorted into categories, making it easier to quickly find inspiration on different themed/types of play such as; Nature, Dinosaurs, Playdough etc.

The main aim of starting this blog was to offer ideas for people wanting to do messy art/play at home, it makes me so happy when people send/tag me in activities they have tried out. I have therefore also made a category to share other people’s take on our ideas called “Inspiring Posts.” I would love you all to tag us (@megaawesomemessyart) or use our hashtag (#makeamesswithmama) if you post on Instagram or you can share via Facebook or email megaawesomemessyart@mail.com.

So a little update about us; we are currently in lockdown in the UK at my parents’ house as our family was in the middle of a house move! Prior to having my daughter I had taken a career break and am now working part time as support staff in a high school. I am therefore very lucky to be able to work from home, care for my children and shield my parents. I have many friends still on the frontline who I worry for and admire, as I do all of those key workers. Thank you all so very much!

My Introduction into the World of Instagram Play Prompts!

I started Mega Awesome Messy Art (MAMA) to document our journey with messy art and to offer tips/advice for others who wanted to create messy memories at home. At the time I had no idea there was a huge community out there of like minded people all wanting to do the same thing!

I was introduced to the world of Play Prompts and Challenges on Instagram when I saw the hashtag #the12weeksofwinter. The aim was to create activities based on a theme that the account put out so I thought I’d have ago for “sunshine”. I created a little montage of us in each season with our shadows and to my surprise our idea was featured and I was then hooked! I found that having a theme allowed me to create activities I would otherwise not have thought of and my son also enjoyed knowing what ‘week’ it was so he could then tell me his ideas too! We picked from different accounts and I tried to tailor activities to what my son was into at that particular moment (mainly dinosaurs, Paw Patrol, vehicles and getting messy!)

After following play prompts I then took the next step and joined a fantastic team who put out play/activity ideas each month. When I joined it was #march_play and now we’re on #august_play which is based on ART IN AUGUST (right up our street!!!) This group changes slightly each month and includes people from all over the world! We bounce ideas off each other and create themes and prompts that people can pick and choose to have a go at. It has given me a fantastic drive to try new things, for example; before joining this group I’d never heard of STEM (Science, Technology, Engineering, Maths) then for #july_play we chose this as a theme for the month and it was fantastic. My son loved doing experiments and learning new concepts and so did I! We’ve also learnt about spin art, coloured rice, magic milk experiments, schemas, clouds in a jar and big outdoor art to name but a few! The group is also another support network for this fantastic but difficult journey that is parenthood!

Whilst participating in play prompts/challenges the issue that Instagram shows a ‘false account of play’ as the pictures are often too ‘perfect’ or ‘posed’ has come up quite a bit. I am hoping our account shows this isn’t always true, as whilst I love setting up beautiful trays and I do take ‘arty’ style photos of the process my main aim is focusing on what my children enjoy and things do not stay ‘perfect’ for long! I also limit myself to taking photos towards the beginning of and end of an activity so the play is not interrupted and my children can have my full attention. Often the direction I thought the play will go is completely different to the way it ends up, which I think is fantastic.  I try to accommodate my son’s wishes as far as possible as often they end up better than mine!

As well as my children having the freedom to be creative I really enjoying being able to express myself through art too by; setting up the play trays, taking photos and making things from their messy art creations such as collages, cards and gifts. I have also started drawing and painting again myself which I find allows me to relax and have some down time (not very much with two kids but every little bit helps!)

So in summary; I am thoroughly enjoying being immersed  in the fantastic community of play and thank all of those who have welcomed us with open arms. The biggest thing I’ve learnt is not to feel pressured to do ALL of the prompts if you feel they will not suit your child, just choose or tailor those that grab your imagination. After all, there is no point in doing an activity if your child doesn’t want to do it, because the whole point is to HAVE FUN!!!

Here is a ‘montage’ of all the things we’ve been getting up to over the last 5 months, I will be putting out some more focused blogs about groups of similar activities soon, so keep an eye out and please follow us on Instagram if you’re not already, maybe you will want to join in and play along too!!!


Play prompt pictures for each month courtesy of @playtime_with_dougie, all other images are from @megaawesomemessyart.

MAMA Children’s Activity Post: “FIZZY EGGS”

IMG_5643

It is ‘Easter’ week for #april_play which I am co-hosting on Instagram. My son really enjoyed an activity we did in ‘April Showers’ week when we made “Fizzy Rainclouds” by mixing baking powder with grated blue chalk and then dropping vinegar onto it to watch the fizzing reaction. I therefore decided to try the experiment again with an Easter twist!!!

The equipment needed for this activity was:

  • Activity space – tuff tray/activity mat.
  • Old clothes/aprons.
  • Coloured chalk.
  • Cheese grater.
  • Plastic bowls.
  • Spoons.
  • Baking powder.
  • Plastic eggs you can open and fill.
  • Egg box.
  • Vinegar (I used white vinegar).
  • Water sprayer.
  • Other decorations – I put out some cardboard eggs.

Prior to starting the activity I grated up some of the large outdoor chalks and then mixed this with baking powder (roughly half & half). I put this ‘fizzy powder’ into plastic eggs of the corresponding colours. I had white eggs too so for these I just put in plain baking powder. I poured white vinegar into a water sprayer and put this and the eggs on our tuff tray and the activity was ready!

I asked my son what he thought was in the eggs? He replied “lets hatch them and see!” It was lovely to see the delight on his face when all the different colours came pouring out!! He decided to make little piles on the cardboard eggs I had put out and enjoyed mixing the colours up with his hands and the ‘egg shells’.

Once he had poured all the ‘fizzy powder’ out I gave him the water sprayer (one of his favourite things) and encouraged him to spray the powder to see what happened. Initially he did not spray enough on but once he got going and saw the fizzing you could see he remembered and got really into it!

Obviously once he’d saturated all the ‘fizzy powder’ there was a request for “more please mama”. Luckily I had prepared extra as I knew this would happen!! My son then spooned/poured more ‘fizzy powder’ onto the piles and he continued spraying.

He explored things with his hands and feet too and decided at the end he wanted to make a ‘waterfall’. This comprised of pouring all of the remaining vinegar out –  this caused much delight and ALOT of fizzing!!! Go to our Instagram account to see video of this!!!

IMG_5679

After my son had finished he decided he wanted to help wash up and he enjoyed playing with all the plastic eggs in the sink for a bit whist I cleaned up the majority of the mess!! Don’t forget to check out #april_play and all of these fabulous accounts!!!

MAMA Children’s Activity Post; Process Art Rainbows & Rainbow Handprint Butterflies!

One of  the play prompts for #march_play was ‘rainbow’. I’d been really looking forward to this as I love rainbows and how vibrant the colours are. I’d seen quite a few accounts doing “scrape painting” and wanted to give this a try with a rainbow twist! 

The equipment needed was;

  • Painting area – tuff tray/activity mat.
  • Painting clothes or aprons.
  • Strips of white card.
  • Window scrapers (like you have for your car).
  • Rainbow colour paints (water based, non toxic). 
  • Felt tip pens in rainbow colours.
  • Flips chart paper/large paper.
  • Wipes.

I set this activity up on our tuff tray I put two strips of card at the bottom as our practice strips then the others in the shape of a rainbow. 

IMG_0002

Onto the card I wrote the names of the colours in their associated colour or put dots of colour as prompts for where my son should aim the paint. He then squeezed a blob of paint onto these prompts to ensure there were in the right order. My son LOVES squeezing paint so it was quite tricky to get him to not squeeze too much – the promise of BIG squeezes later seemed to work!! 

Once the paint was in line I positioned the window scraper and explained what he had to do. I did it with him for the first little bit but then he insisted he could do it by himself, and actually he could! The rainbow colours looked gorgeous!!! He then moved on and did the same all the way round the rainbow. 

After he had finished we were left with a beautiful rainbow!!!

After this he wanted to paint more with the window scrapers so I moved our rainbow paintings and put down some big flip chart paper and said he could experiment however he wanted to. He chose to squeeze out a lot of paint and then scrap it all over the tuff tray. He named all the colours as he squeezed them out.


He made some lovely patterns and had a lot of fun mixing everything together into a big brown mess!!! Of course hands and feet got involved too! I love just letting him explore and have fun I think it really let’s him learn and create independently which is so lovely to see.

The rainbow paintings he made were gorgeous and so I think I am going to frame bits of them and with the practice strips we went on and did another activity; ‘Rainbow Handprint Butterflies’. The equipment needs to make these was;

  • Making area – tuff tray/activity Mat.
  • Rainbow paintings.
  • Scissors.
  • Pen/pencil.
  • Card.
  • Large lolly pop stick/tongue depressor.
  • Paint sticks/paint.
  • Pipe cleaners.
  • Double sided sticky tape.

I drew around my son and little girls’ hands on some card to make templates. I then cut out the handprints from the rainbow paintings we had made. Two of my son’s and two of my daughters for each butterfly. 

I put double sided sticky tape on the handprints and my son helped to stick these onto the tongue depressor ‘bodies’. We then stuck on pipe cleaner antennae and my son painted the bodies of the butterflies with his new paint sticks! 

IMG_0022

Lastly we stuck on some googley eyes and our gorgeous rainbow handprint butterflies were complete! 

IMG_2370

I totally love a handprint craft as to me they are memories for us to keep. I liked this activity especially as it was our process art creations that formed the basis of the handprints and my son helped to make and finish decorating the butterflies rather than me just making them on my own. Why don’t you have a go at making handprint butterflies from your messy art creations!!! 

I m now co-hosting #april_play on Instagram so please follow our new play prompts and these wonderful accounts for even more creative ideas!!! 

MAMA Children’s Activity Post: “Spring Sensory”(#MARCH_PLAY)

IMG_0373

One of the play prompts for #march_play was ‘Spring Sensory’. I used this prompt to do an activity I had been longing to do; ‘Shaving Foam Marbling’ with a spring twist! The equipment needed was:

  • Tuff tray/activity mat.
  • Painting clothes/aprons (my son uses his old puddle suit).
  • Tray  (I used a ceramic lasagne tray).
  • Shaving foam.
  • Food colouring.
  • Pots.
  • Pipettes.
  • Something to swirl the colours with – lollypop sticks/cotton buds.
  • Card to make prints with – I used white card in easter egg and duckling shapes.

IMG_0372

I explained to my son about dropping on the colours to the shaving foam first and as he is loving the pipettes at the moment he was very keen to do this!

IMG_0383

He then chose the cotton bud to swirl the colours around – he loved watching them all mix together and I had to ask him to stop briefly to do the prints otherwise he would have continued until it was a big mess (he did get to do this later though I promise!)

I had completed a test run of this activity with different coloured card cut outs – I found that pure white worked the best as coloured card distorted the swirled colours and did not seem as vibrant. I gave my son the cut out shapes and asked him to push them down into the foam a little bit and then lift them back out.

 I then scraped off the excess foam to leave behind some gorgeous marbled patterns!!

After making these lovely prints I asked my son what he wanted to do and his answer was to “mix a potion” – no surprise there!! He also mixed in the magnetic letters so we had a game of hunt the letter too!

I loved the results of this activity and it really is easy to set up and do. It produces some gorgeous works of art; I am planning on making the final products into Easter cards!

IMG_0458

Why not have ago yourself and don’t forget to check out #march_play on instagram and share any of your lovely creations!!


MAMA Children’s Activity Post: Making a Mess with Flowers!

IMG_9873 2

With Mother’s day coming up this is a wonderful activity for mums to do with their children to create personalised, one of a kind art pieces to love and cherish. This activity was inspired by the play prompt “plants” from #march_play on which I am currently co-hosting and would advise you check out (see end of blog for more information)!

I set up the activity on our tuff tray with this equipment:

  • Tuff tray/plastic activity mat.
  • Painting clothes/aprons.
  • House plants – for inspiration and mark making tools after a bit of pruning!
  • Coloured paper/card.
  • Felt tip pens/stampers.
  • Card flower cut outs.
  • PVA glue and pot.
  • Scissors.
  • Tape.

Upon my son’s request I later added:

  • Paint – purple and pink (water based, non-toxic)
  • Extra pots.

IMG_9832

The first idea I had was drawing around our hands to act as plant bases and then sticking on the card flower cut outs. My son drew round his own hand and I was pretty impressed with his effort, I then drew around mine. We used PVA glue to stick card flowers all over the fingers to make them look like plants.

I asked if he wanted to colour anything in at all to which he said “can we use paint?” Now I had set this activity up in our living room, with carpet, so I was hesitant to begin with but……….. he asked so nicely I said ok, along as he kept the paint in the tray – and to be fair he did and actually created some beautiful paintings!!

We cut/pruned some of the plants so we could use the leaves and flowers as mark making tools and we squirted out some pink and purple paints (my favourite colours!) into the pots.

My son chose the pink flowers to use mainly – he dipped them into the paint and made swirling and splodgy patterns. He was so mesmerised with the swirling and the patterns he made it was lovely to watch. The mix of the pink and purple was also really beautiful. I was please to have taken lots of photos of the process as they came out really well too (you can also see videos on my Instagram account).

The final pictures were really pretty and I plan on framing them!

IMG_9905

Why don’t you get nice and messy and create some fantastic messy art this Mothers day! Don’t forget to follow us on Instagram, Facebook & Twitter and share any of your MAMA makes wit us!

#march_play:


MAMA Children’s Activity Post: “Goldilocks & the Three Bears! (#MARCH_PLAY)

I’m currently co-hosting #march_play on Instagram with a bunch of lovely other accounts;

IMG_7519

Each day we have a play prompt to guide our activities. My favourite so far has been ‘fairytales’. When looking at this prompt it dawned on me that I hadn’t really read any traditional fairytales with my son as we mainly read the newer ‘Gruffalo style’ books. I therefore saw this as an opportunity to share one of my favourite fairytales with him; ‘Goldilocks and the Three Bears’. In the morning I told him the story and we then watched an animated version. He really got into the whole “Who’s eaten my porridge?” and the concept of different sizes.

In the afternoon I set up an invitation to play based on the story. Here is the equipment I set out;

  • Tuff tray (could use activity mat).
  • Painting clothes (I now use an old puddle suit which is great!!)
  • Different sized card strips (width = small, medium, large).
  • Paw print stamps – small and medium were potato stamps I had cut out, the large one was a gravy granules pot with three corks strapped to it with hairbands (a rare moment of genius for me!)
  • Brown, red, yellow and blue paint (water based, non toxic).
  • Paper plate.
  • Paint brushes.
  • PVA glue.
  • Card cut outs of different sized bears.
  • Cotton wool/Pom Poms/tissue paper to collage with.
  • Three different sized bowls with matching spoons.
  • Porridge oats.
  • Lolly pop sticks (added later for mixing).
  • I’d also found some cuddley toys which played out the story we went through earlier (I moved these before we got messy though!)

IMG_9629

The first thing my son wanted to explore were the bear prints! Whenever we’re out and about he’s always looking for “tracks to follow” and the thought of making his own seemed to really excite him. He squirted out the paint himself and painted onto the bottom of the stamps.

I helped with the first print to show him how you have to push downwards firmly. After this he was away and went through the Daddy bear, Mummy bear and Baby bear footprints very quickly!

Then it was the porridge he was interested in. I reminded him of the porridge in the story and we went through how; Daddy bear’s was ‘too hot’ and a hot colour is red, so we mixed the red paint into his porridge in the big bowl.

We then moved onto Mummy bear’s porridge, in the medium sized bowl, which was ‘too cold’ and mixed the blue paint in with that. Finally, baby bear’s porridge in the small bowl was ‘just right’ and I felt yellow would suffice for this!

Once we’d mixed up our ‘porridge paint’ we added some PVA glue to each bowl to make it ‘sticky porridge paint!’ My son then experimented with painting the bear’s, pouring the porridge paint everywhere, mixing it with his hands and doing a bit of collage. Mainly he was interested in making mess which is the whole point with messy, arty, sensory activities!!!

After this he went back to the idea of paw prints and wanted to make his own! So we got the brown paint back and he did some footprints on a piece of card to go with the bear prints!

Inevitably this activity was quite messy requiring a deep clean in the tub afterwards! This play prompt had lots of different levels and it was lovely to take the theme throughout the whole day and include sharing some of my childhood memories with my son. Why don’t you have a go too with your favourite fairytale!

IMG_9738.jpg

Don’t forget to follow us on Instagram, Facebook & Twitter as well as here on the blog http://www.megaawesomemessyart.com!!!

MAMA Children’s Activity; ‘Melting into spring!’ (#MARCH_PLAY).

For day 3 of #march_play the prompt was Melt! This took a bit of prep the day before but was otherwise very quick and well worth it!

Equipment;

  • Silicone cupcake moulds/ice cube tray.
  • Petals (I used rose and daffodils – from day 1!).
  • Sandwich bag.
  • See through Pyrex/plastic dishes.
  • Water.
  • Pots.
  • Food colouring.
  • Salt.
  • Pipettes.
  • Spoon.
  • Paper doily.
  • Card flowers.
  • Puddle suit/apron.
  • Wipes/kitchen roll/towels.

The day before doing this activity I put some different petals into silicone cupcake cases and filled them up 2/3 with water then put them in freezer. Once this was frozen I topped them up with more water so the petals were frozen within the block. I also put spare petals in a sandwich bag and put them in the freezer to add more texture to the activity.

I set things up on the tuff tray and dressed by son in his puddle-suit as I knew things would get pretty wet! I also had towels and kitchen roll on hand.

I set up 3 ‘frozen cupcake stations’ – one with extra frozen petals, one with a paper doily and one with little card flowers. I used see through Pyrex dishes so you could see things from all angles and I put the extra bits in the dishes so my son could see the colours mixing on them and see things floating once the frozen cupcakes had melted.

There were then three pots with different coloured water (made by adding a few drops of food colouring to the water) with a pipette in each. Finally there was a pot full of salt to aid the melting!!!

IMG_7943

We started by pouring salt onto the ice cupcakes and then pipetting the coloured water onto them and watching the colours mix and the ice melt.

My son then went onto; mix potions and pour these on the ice, pour water on the tuff tray to watch the frozen petals move and watch the water soak up into the kitchen roll!

We left the frozen cupcakes out once my son had had enough but he kept going back and checking on them till they had all melted! He even explained everything to his baby sister who had been watching until it was nap time!

This fun sensory experiment really allowed my son to explore and learn a lot about melting, colour mixing, floating and water movement which was a lot more than I set out to do – amazing what the imagination of a child can create! We even made a little collage with the doily, petals and paper flowers after tidying up!

IMG_8058

Don’t forget to share your “melt” activities on Instagram and keep an eye out for more exciting play prompts and shares from all of the hosts:

IMG_7519

MAMA Children’s Activity: St David’s Day & Yellow! (#MARCH_PLAY)

For the month of March I am excited to be joining some lovely bloggers on Instagram in hosting #march_play. We have concocted a list of play/craft prompts for each day of March to inspire our followers and encourage the sharing of ideas amongst a very creative community!

For March 1st we did an activity combining daffodils and the colour yellow to celebrate St David’s Day! We set this activity up on our tuff tray in the kitchen (although if the weather is nice it would be lovely to do outside!).

IMG_7685 2

Equipment:

  • Tuff tray/plastic activity mat.
  • Painting clothes/aprons.
  • Card/paper.
  • Masking tape.
  • Yellow paint (Water based/non-toxic).
  • Paint pots.
  • Paint brushes/sponges.
  • Water (to add to paint if you want to!)
  • Daffodils/yellow card flowers/egg boxes cut into flower shapes/tissue paper (or other different textured items).
  • Wipes.
  • Green pipe-cleaners.
  • PVA glue/sticky tape.

Once we’d set up all the equipment it was time for one of my sons favourite parts – squeezing out the paint! Now whilst some of it went in the pots he mainly enjoyed squeezing it over the paper, tuff tray and himself! Our yellow paint bottle was almost empty so he then asked for water to be added so he could squeeze out every last drop of colour!! Needless to say it got pretty messy, pretty quickly but it was ALOT of fun!

After squeezing lots of paint out he decided to stomp around in it and make footprints on the paper as well as slipping and sliding through it!

He then did some mark making with the daffodils and brushes on the card and painted some of the egg box flowers too.

After he did this I took the card paintings away and he went back to his favourite activity squeezing the water/paint mixture out of the bottle and slipping all over the tuff tray! We left our paintings and egg box flowers to dry and then required a good scrub in the tub before tidying up the rest of the things later!

With the egg box flowers we stuck some of the tissue paper in the centres and a green pipe-cleaner to the back to make some daffodils to display!

IMG_7915

Why not check out all of these other accounts and join in with #march_play. Don’t forget to share your activities with us – we will be posting our favourites on our instagram stories! I will also be writing up blogs of our contributions!

IMG_7519